1:100 Zaku Kai (ザク改) - Chest Construction |
The design for the chest has remained reasonably stable over the course of the project. The original design plan for the chest was a bit blockier, more rectangular from the front profile. This was streamlined a bit at some point around the time I created the "Ortho Front #2" drawing, making the chest narrower toward the top, emphasizing the upward "curve" defined by the planes of the chest block. The other change was to the back: my early design plans were inconsistent in a few areas, mainly in regard to the downward-facing diagonal plane at the bottom of the back. I wanted the edge between this plane and the rest of the back to be horizontal, but this was inconsistent with the way the plane was drawn. This led to the idea that the back should actually be convex from its top profile, which was an idea that I liked for other reasons as well. (The original design for the back, being rather planar and parallel to the front-view plane, turned out to be rather boring.) Many of these details were worked out on paper, with a few aspects being resolved when the Blender model was made.
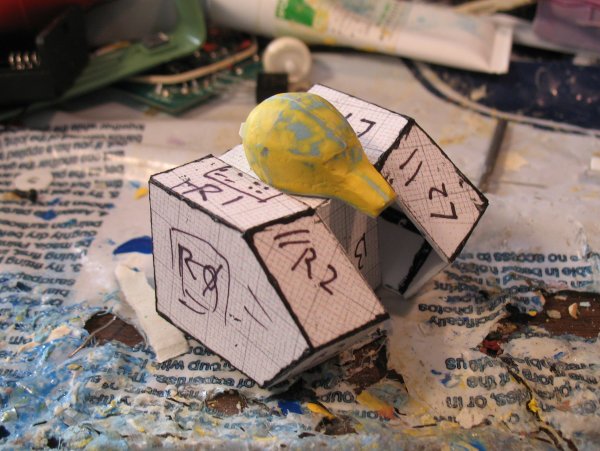
A while back I created a paper model of the chest based on my design plans - it was a bit crude but it was very reassuring to see my design as a real 3-D object and feel confident that it was correct. Now I've decided to dive in to the process of creating a more final version: in this first attempt I've used the same cut-out templates as I used for the paper chest, but I cut the parts from 1mm styrene sheet and miter-joined them with solvent glue and black CA. The resulting chest block feels reassuringly solid. However, after building the chest block I realized that there were some important differences between the templates I'd used for the paper chest and the current design plans: specifically, the paper chest block didn't include the angled plane at the bottom of the back, and the upper planes of the back were the same parallel, upright surfaces from the initial design. This is unfortunate, as it means I must either hack-and-patch the newly created chest block to fix it, or else make a new one. At the moment I'm leaning toward the second option due to the numerous small changes that would need to be made to the existing part in order to correct it. Quite a blunder: but nonetheless the completion of this part gives me a nice feeling of progress in the project.
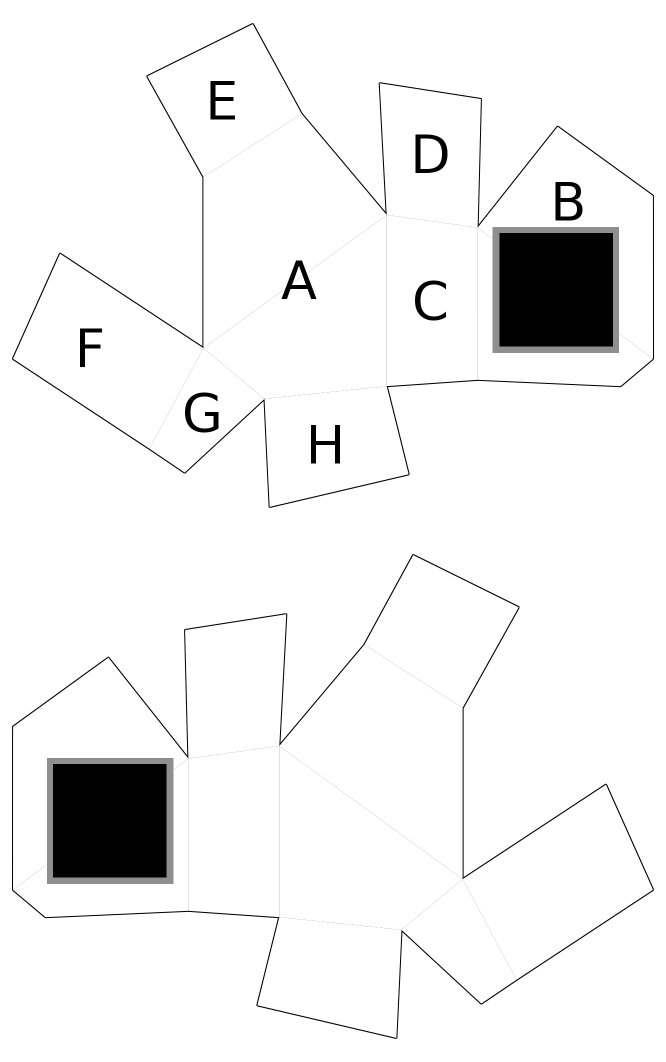
As mentioned previously, after I'd built my first attempt at the chest block part I realized that the plans I used to do it were incomplete - lacking in a couple features that had already been incorporated into the design plans, and a few of the angles had changed somewhat between that design and the current one. The process of creating the templates I used for the paper chest was fairly labor-intensive, as well: I did it by breaking up the chest design into triangles, calculating edge lengths, and putting triangles on graph paper with those edge lengths. The resulting "unfolded mesh" was adequately precise for its purpose but it had too many flaws to be used for a final part. So this time around I started with my Blender model, and used the "unfolder" script to turn a simplified version of the chest block into a template for building the part from styrene. As before, I used 1mm plastic sheet for the construction, and cut mitred edges where segments were to join.
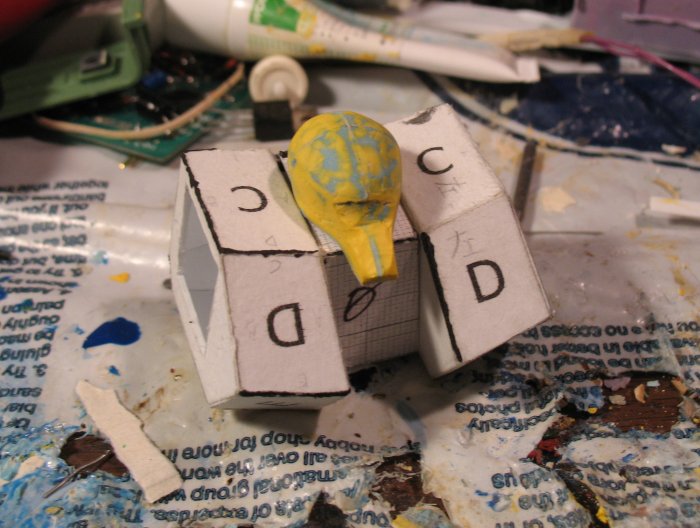
The process yielded a much better template, and so the parts went together with fewer gaps and better consistency between the two sides. However, after finishing construction of the part I discovered that something in the process was adding length to the dimensions of the chest block: it could be that I didn't cut the parts out quite right but I think mostly it was a problem with the mitre joins. They weren't cut quite carefully enough and so they're not precise: I've added about 1mm to the width of each chest half and other dimensions have grown around a half-milimeter. I'll likely just sand down the excess volume to solve the problem. In the future I'll probably use thinner plastic for the assembly, and possibly account for this error in my part templates, as well.
After the basic block was done, I created guides to help in the placement of the shoulder joints and cut holes for them. I also cut out the recess in the back where the backpack will sit, though I seem to have cut it wider than it ought to be. The opening in the back will be filled with poly putty later on in order to get a good fit for the backpack.
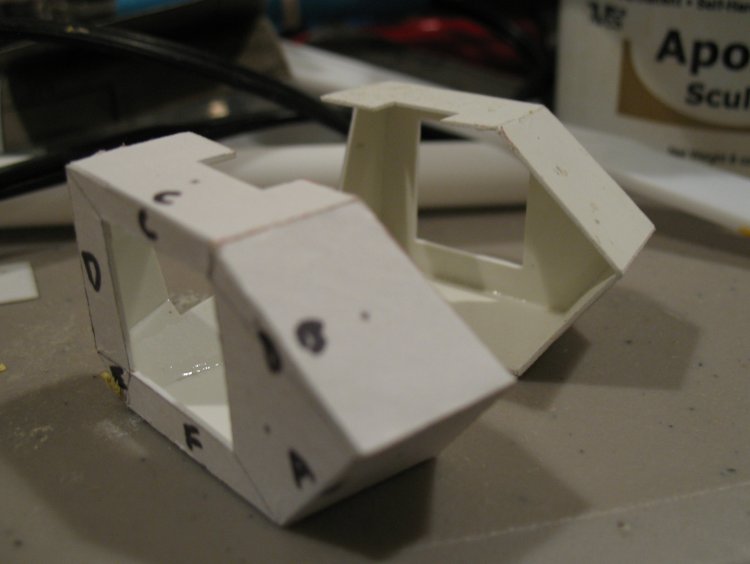
In the views showing the back and underside of the new chest block, it is the segment marked "G" that wasn't represented in the previous attempt at building the chest block. Rather, plates F and H simply met at an edge at the bottom of the chest block. Additionally, the "H" plates were parallel to each other in the previous chest block attempt, where now they are angled, so that the areas nearest the middle of the body extend farther back.
After constructing the second version of the chest block, I examined my design and decided that the chest block would look better if it were less tall vertically - so I determined that I would have to build another one again. Due to a problem with my installation of Blender I was unable to use the unfolder script this time, so I got the information I needed by manually unfolding the simplified chest mesh and screen-capturing the result.
This time around I also used thinner styrene: .5mm instead of 1mm, for construction of the parts. This made it easier to cut and assemble the parts, but also made the resulting part more prone to warping. I experienced similar problems when working on the backpack. As a result, I will likely stick to 1mm sheet for this kind of thing in the future.
New in this version of the chest block parts are the included cutouts for the backpack, arms, and detail bits. In retrospect I should have added cutouts for the vents at the bottom-front of the chest, too. Oh, well.
The third version of the chest block part had a few problems: in particular it was prone to warping and it didn't have the holes on the bottom of the chest block drilled out, or even marked. As a result I decided to remake the chest block part from thicker stock, and drill out the holes before assembling the bottom plate to the rest of the chest block.
I got as far as assembling the left-side part for the fourth version of the chest block before I realized that the Blender mesh I was "unfolding" to produce the part template was crooked in places. To correct the problem, I started over with a new Blender mesh for the fifth version.
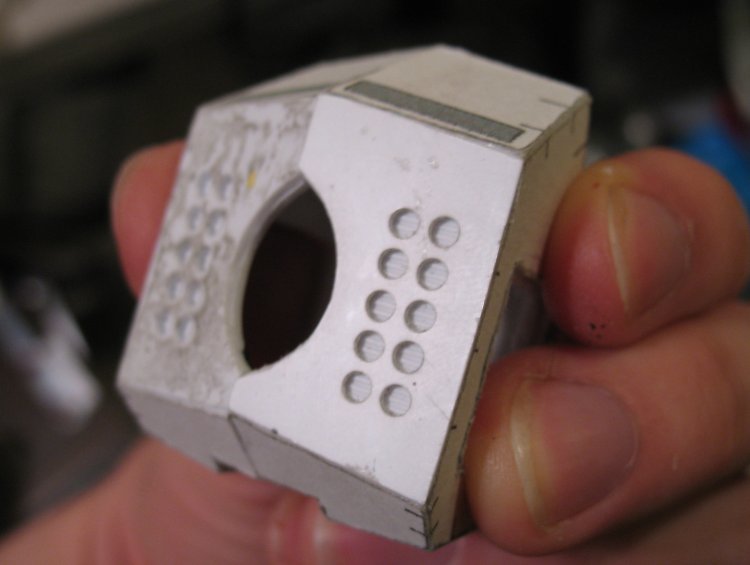
Drilling the holes - two rows of five holes, evenly spaced at 3.25mm between centers, proved to be a bit of a challenge. In the early attempts, I tried lining up the drill bit with the template markings on the part itself by eyeballing it, using a straight-edge guide to help the rows come out straighter. That proved difficult: with only .75 mm space between the holes, small errors were too easy to spot. To help make the drilling more precise, I cut a set of guides from styrene strip, to line up the part at the correct point along the drill press's straight edge. The result was a noticably better set of holes.
Once the v5 parts were assembled, I used left-over plates that I'd cut out for the v4 parts to reinforce the inside of the v5 parts: 1mm thickness was enough to make a fairly strong part, but I felt that the parts would recast better if they were 2mm thick. The parts are not yet finished but at this point I'm confident that I won't need to start over again.